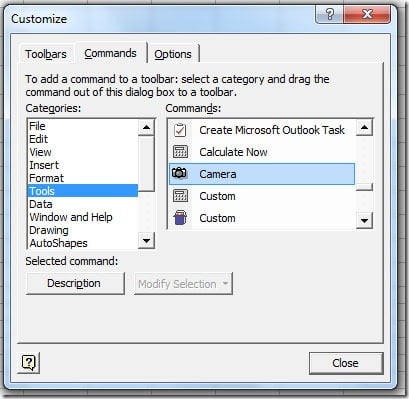
Excel has a hidden feature that most of the users don’t know. It’s the Camera Tool. For Excel 2003, you can get the button for the Camera Tool by going to Tools-Customize, on the Commands tab, find the category Tools. Scroll down until you find the Camera button. Drag and drop the button into one of your toolbars. Close the customize dialog window.
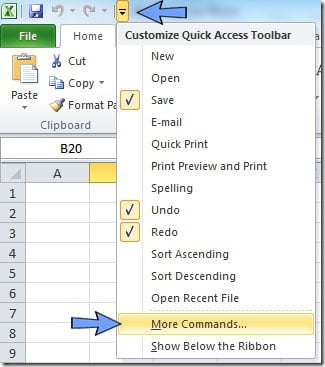
For Excel 2010, you need to make the Camera button appear on the Excel Quick Access Toolbar. Go to Quick Access Toolbar, click on the drop down button and select More Commands, like on the picture below:
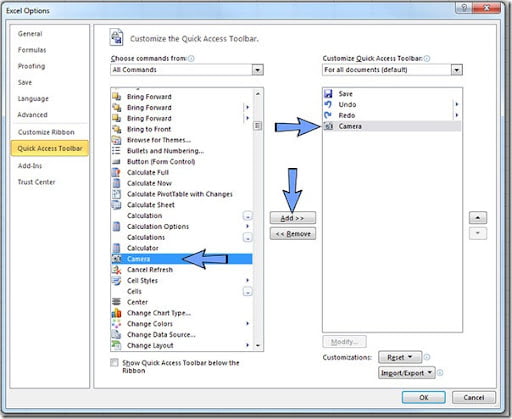
This will open Excel Options dialog box. On the “Choose commands from” drop down select “All Commands” to see all Excel commands. Scroll down the list until you see the Camera command. Select it from the list and click on the Add button on the right. Once it appears on the right box, click OK button from the dialog box.
Your Camera button will appear now near the drop down button on your Excel Quick Access Toolbar:
Now that you have the Camera Tool button available, let’s see what you can do with it. This tool can be very useful if you want to display a part of your sheet on another location, without affecting the formatting of that area. Let’s see a practical example. Suppose I have the following table:

I want to show this table on a chart. For that, I will “take a picture” of the table from one of the sheets and place the “picture” on top of the chart that I have on another sheet. Just select the table cells and click on the Camera tool button on your toolbar. Then on the sheet that has the chart just click on one cell and the “picture” of your table will be displayed like if you have inserted a picture on your sheet. You can now work this “picture” the way you want it to look and place it on top of your chart. The final result will be something like this:
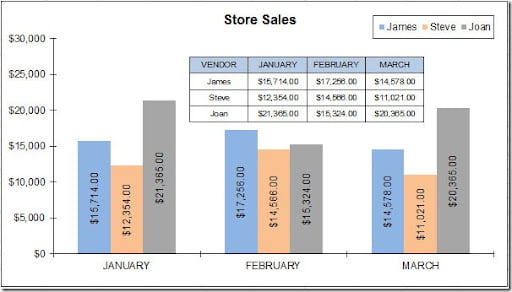
This tool is very useful if you want to display tables from different sheets without having to adjust the formatting of the target sheet.
