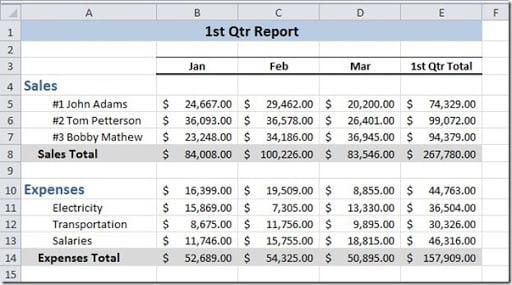
Imagine that you want to build a report on a worksheet like this:
As you can see, the names of the vendors and the names of the expense groups, as well as the totals, are pushed away from the left of the cells. This improves the report look and makes it easier to read it.
Many people use blank spaces to make this kind of text alignment because they don’t know that Excel has an Indent feature right on the Home tab (Excel 2010) that can make this job a lot easier. Just check on the Alignment group of your Home tab for this two buttons:
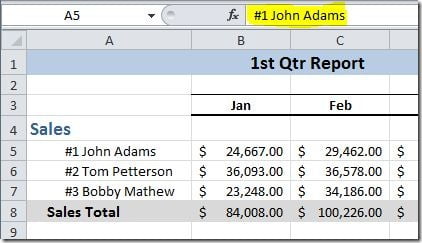
The one on the left is the Decrease Indent and the one on the right is the Increase Indent. To use this, just select the cells that you want to indent and click on the Increase Indent as many times as the amount of “blank space” that you want to see on the left of your text. The indent will not add blank spaces to your cells content, as you can see on this image:
If you check on the formula bar, cell A5 doesn’t have any blank spaces on it but on the sheet, it looks like it has. This is one of the advantages of using indent instead of inserting blank spaces. If you want to remove the indent, just select the cells and click on the Decrease Indent button. If you had inserted blank spaces on each cells, and you wanted to remove it, you would need to go cell by cell, edit and remove each blank space!


